The Ultimate Guide to Using a Nose and Ear Hair Trimmer Safely and Painlessly
By Myfreebird | Published: 2026-06-13
Category: How-to Guides
Learn how to use a nose and ear hair trimmer safely and painlessly with expert tips, hygiene steps, and product recommendations for a comfortable grooming experience.
Unwanted nose and ear hair is a natural part of aging, but removing it doesn't have to be a painful or nerve-wracking experience. Many men avoid trimming these areas because they fear nicks, cuts, or the dreaded pulling sensation. However, with the right tools and techniques, you can achieve a clean, painless groom in just a few minutes. This guide will walk you through everything you need to know about using a Pro Nose & Ear Hair Trimmer safely, from preparation to aftercare, ensuring you never dread grooming again.
Why Nose and Ear Hair Grows and Why Grooming Matters
Nose and ear hair serve as natural filters, trapping dust, allergens, and debris before they enter your body. As you age, hair follicles become more sensitive to testosterone, leading to increased growth. While this hair is functional, excessive growth can become unsightly or even uncomfortable. Regular trimming helps maintain a polished appearance, improves hygiene, and can even enhance your sense of smell and hearing by reducing blockages. The key is to trim—not pluck or wax—to avoid damaging the delicate blood vessels inside your nostrils and ear canals.
Choosing the Right Trimmer: Key Features for Safety and Comfort
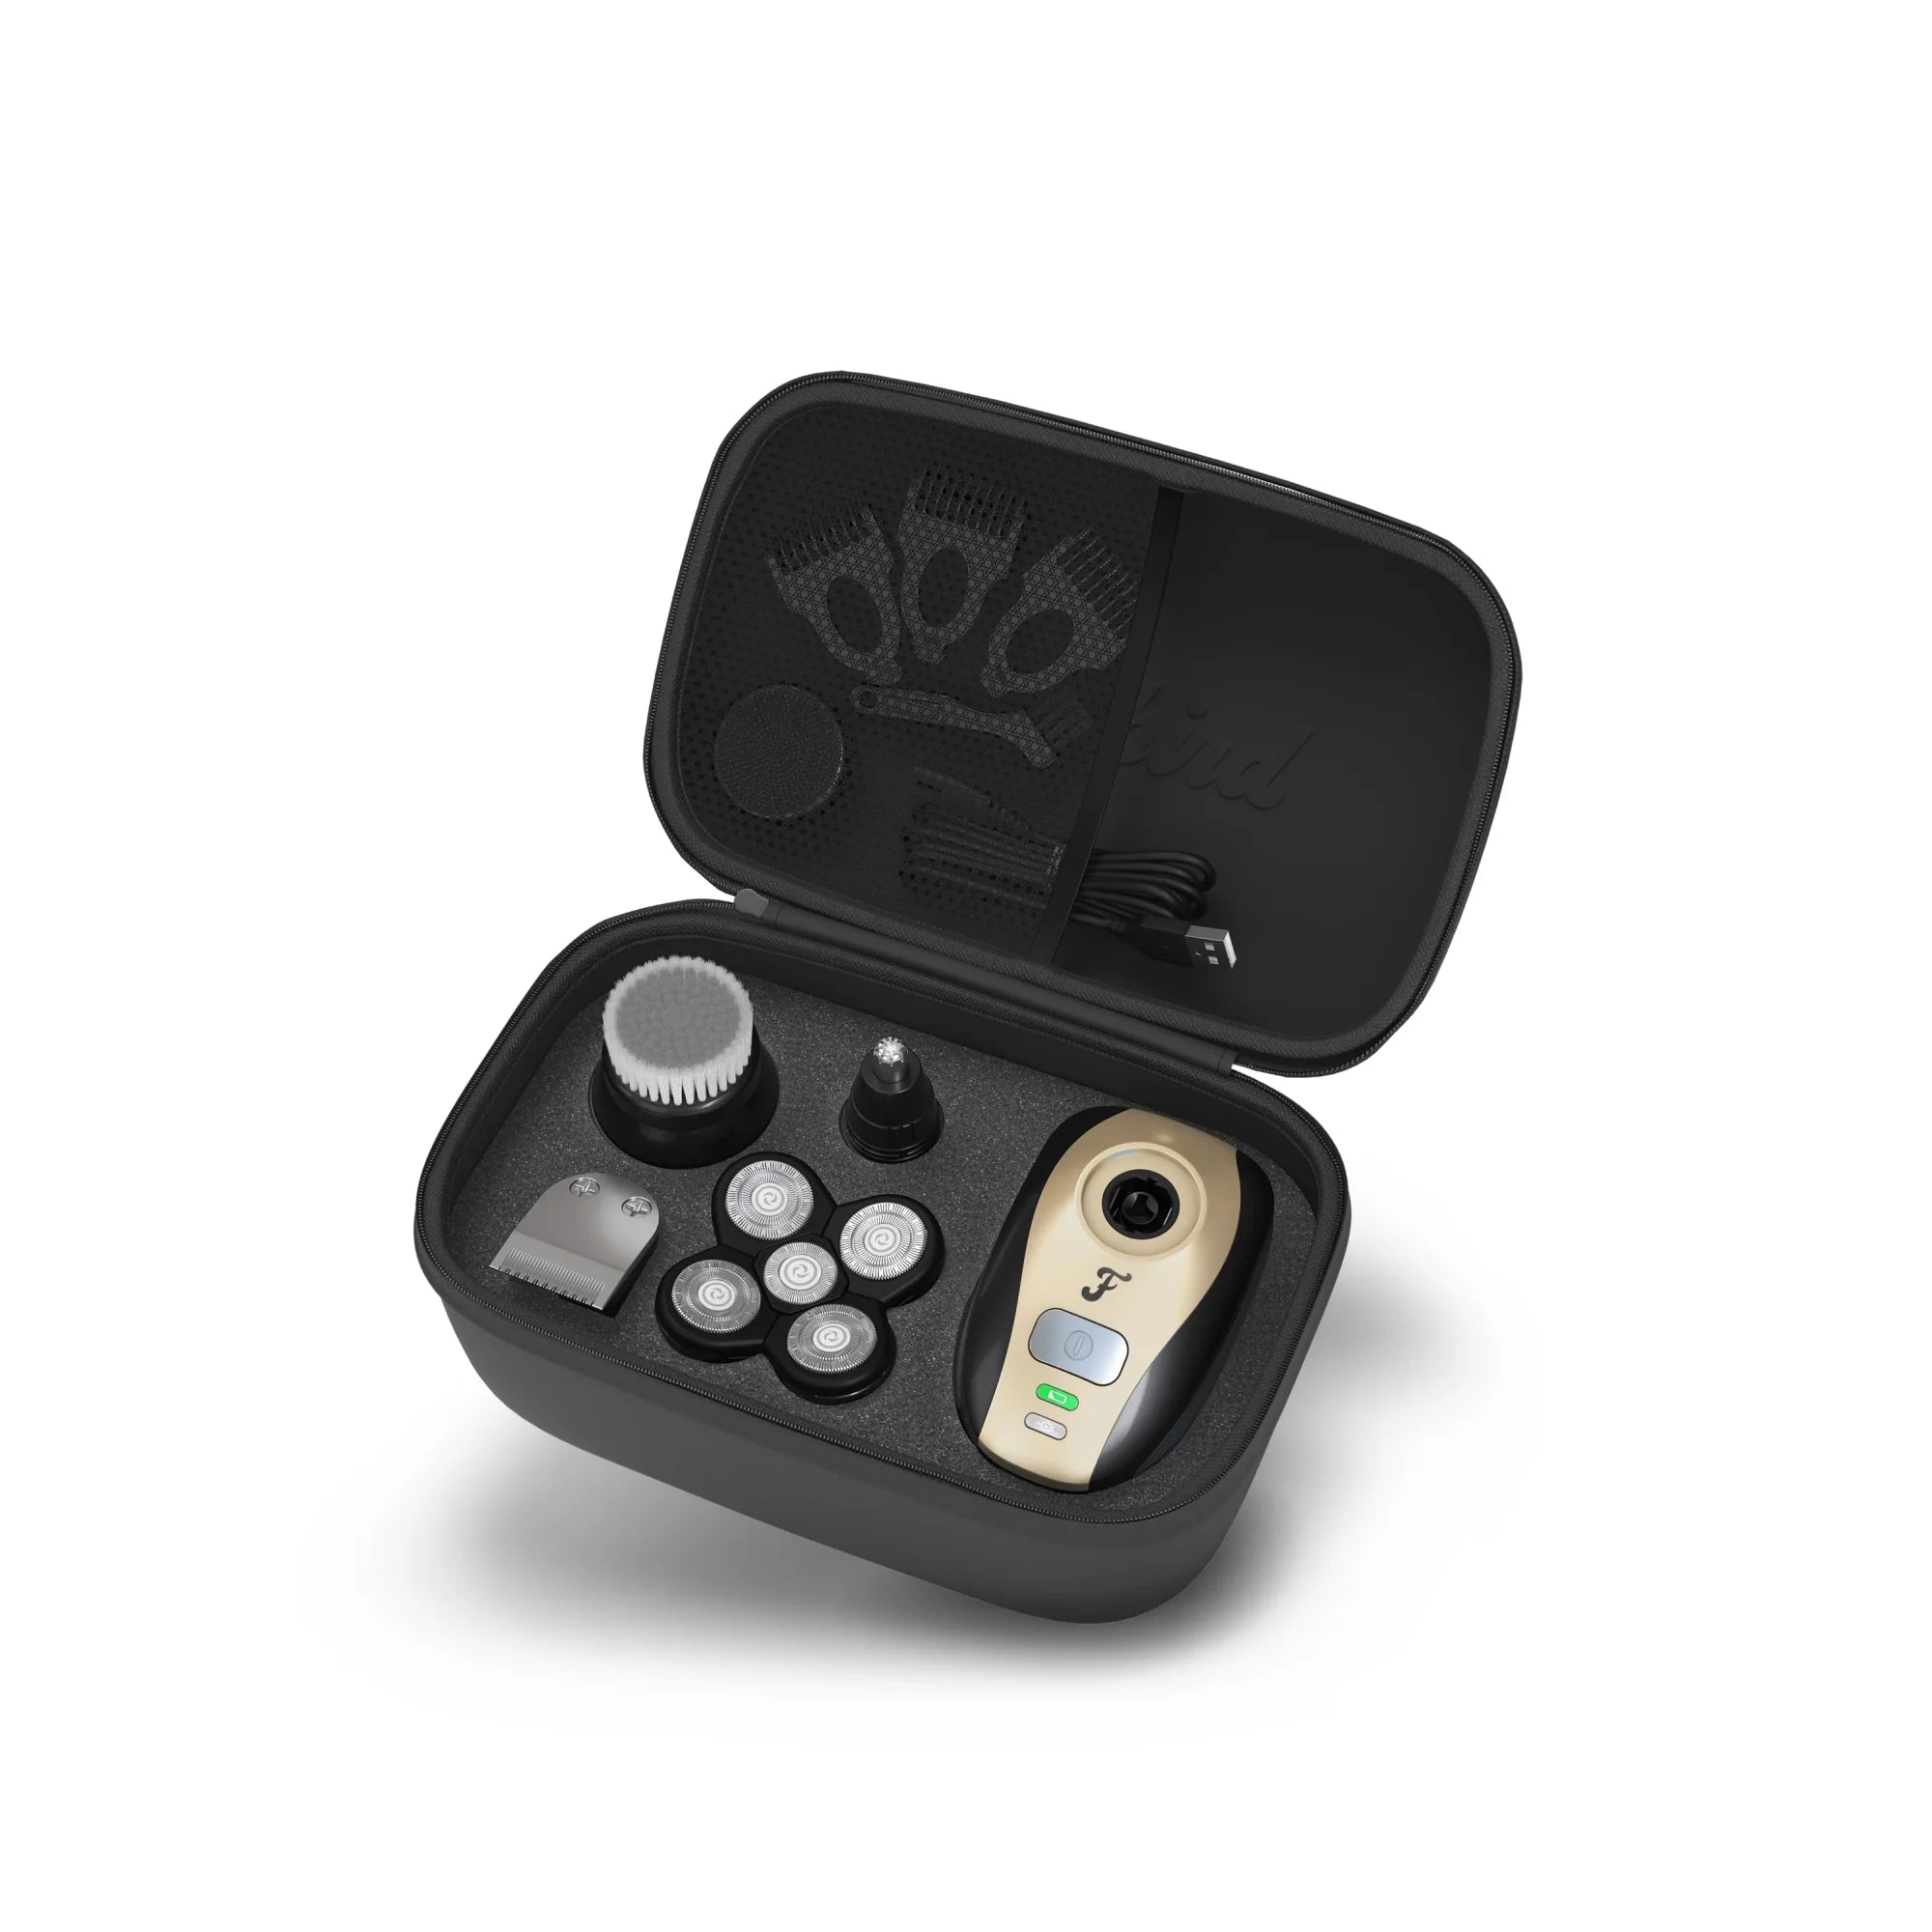
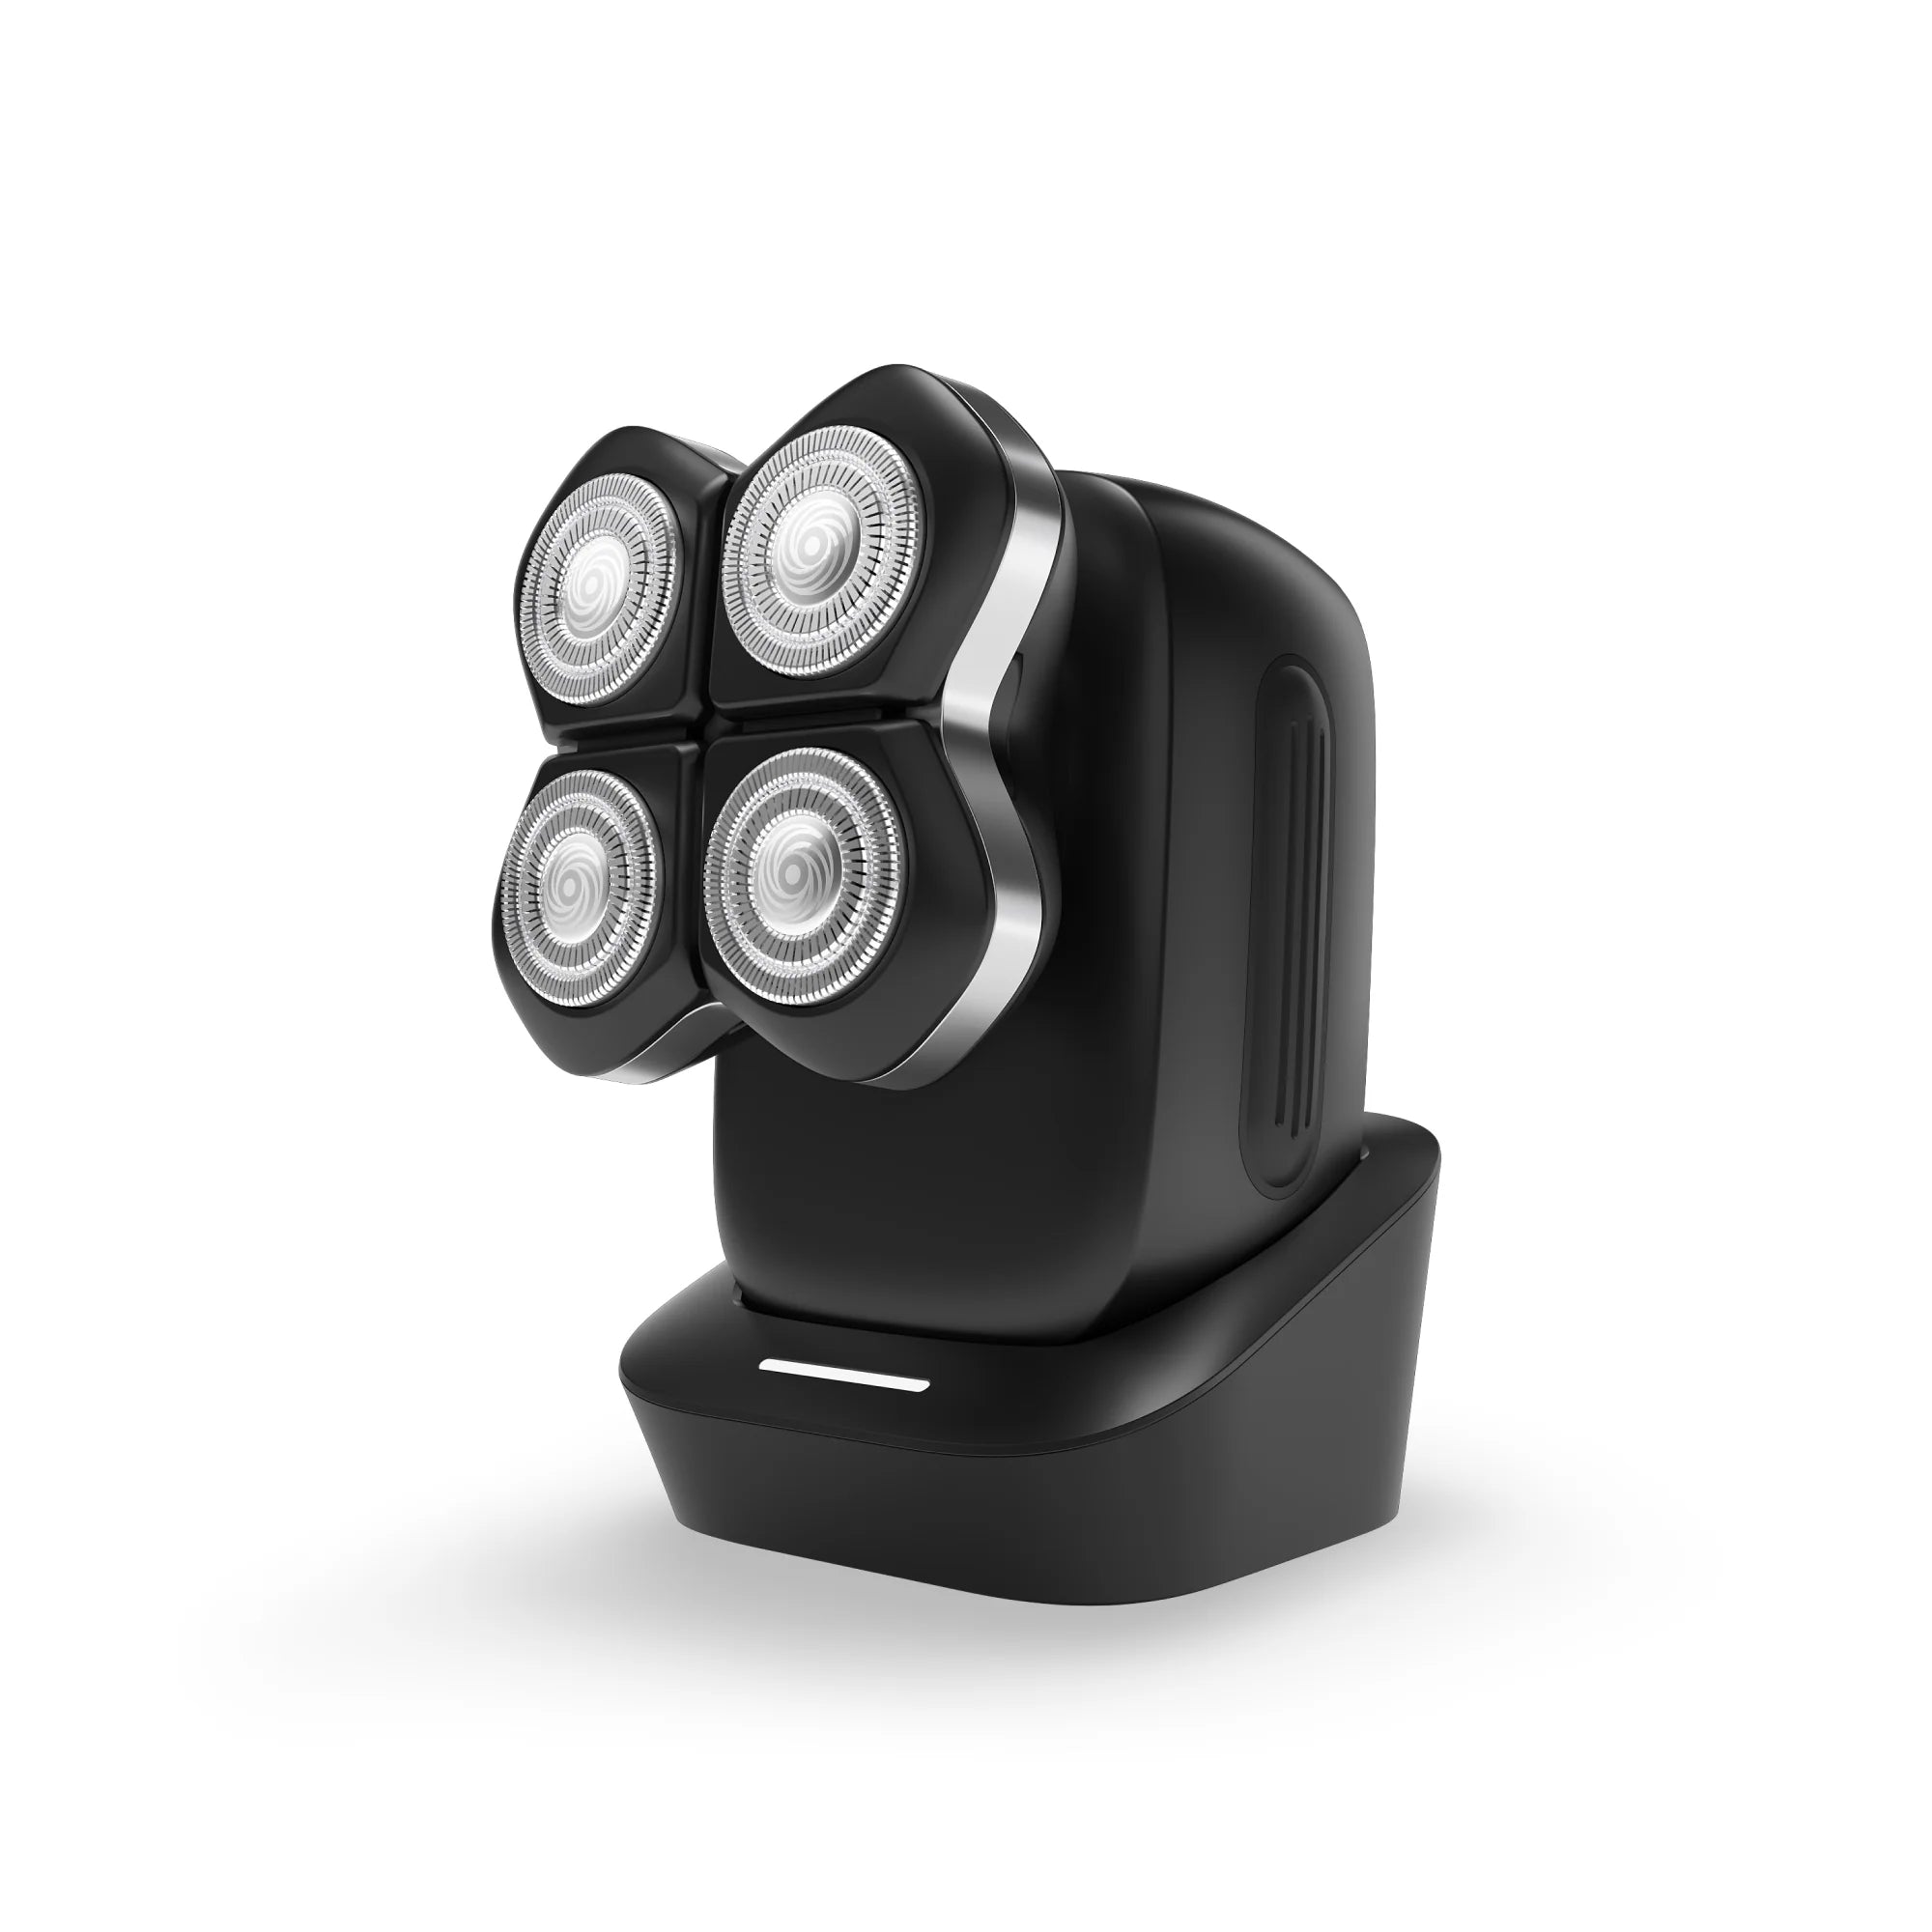
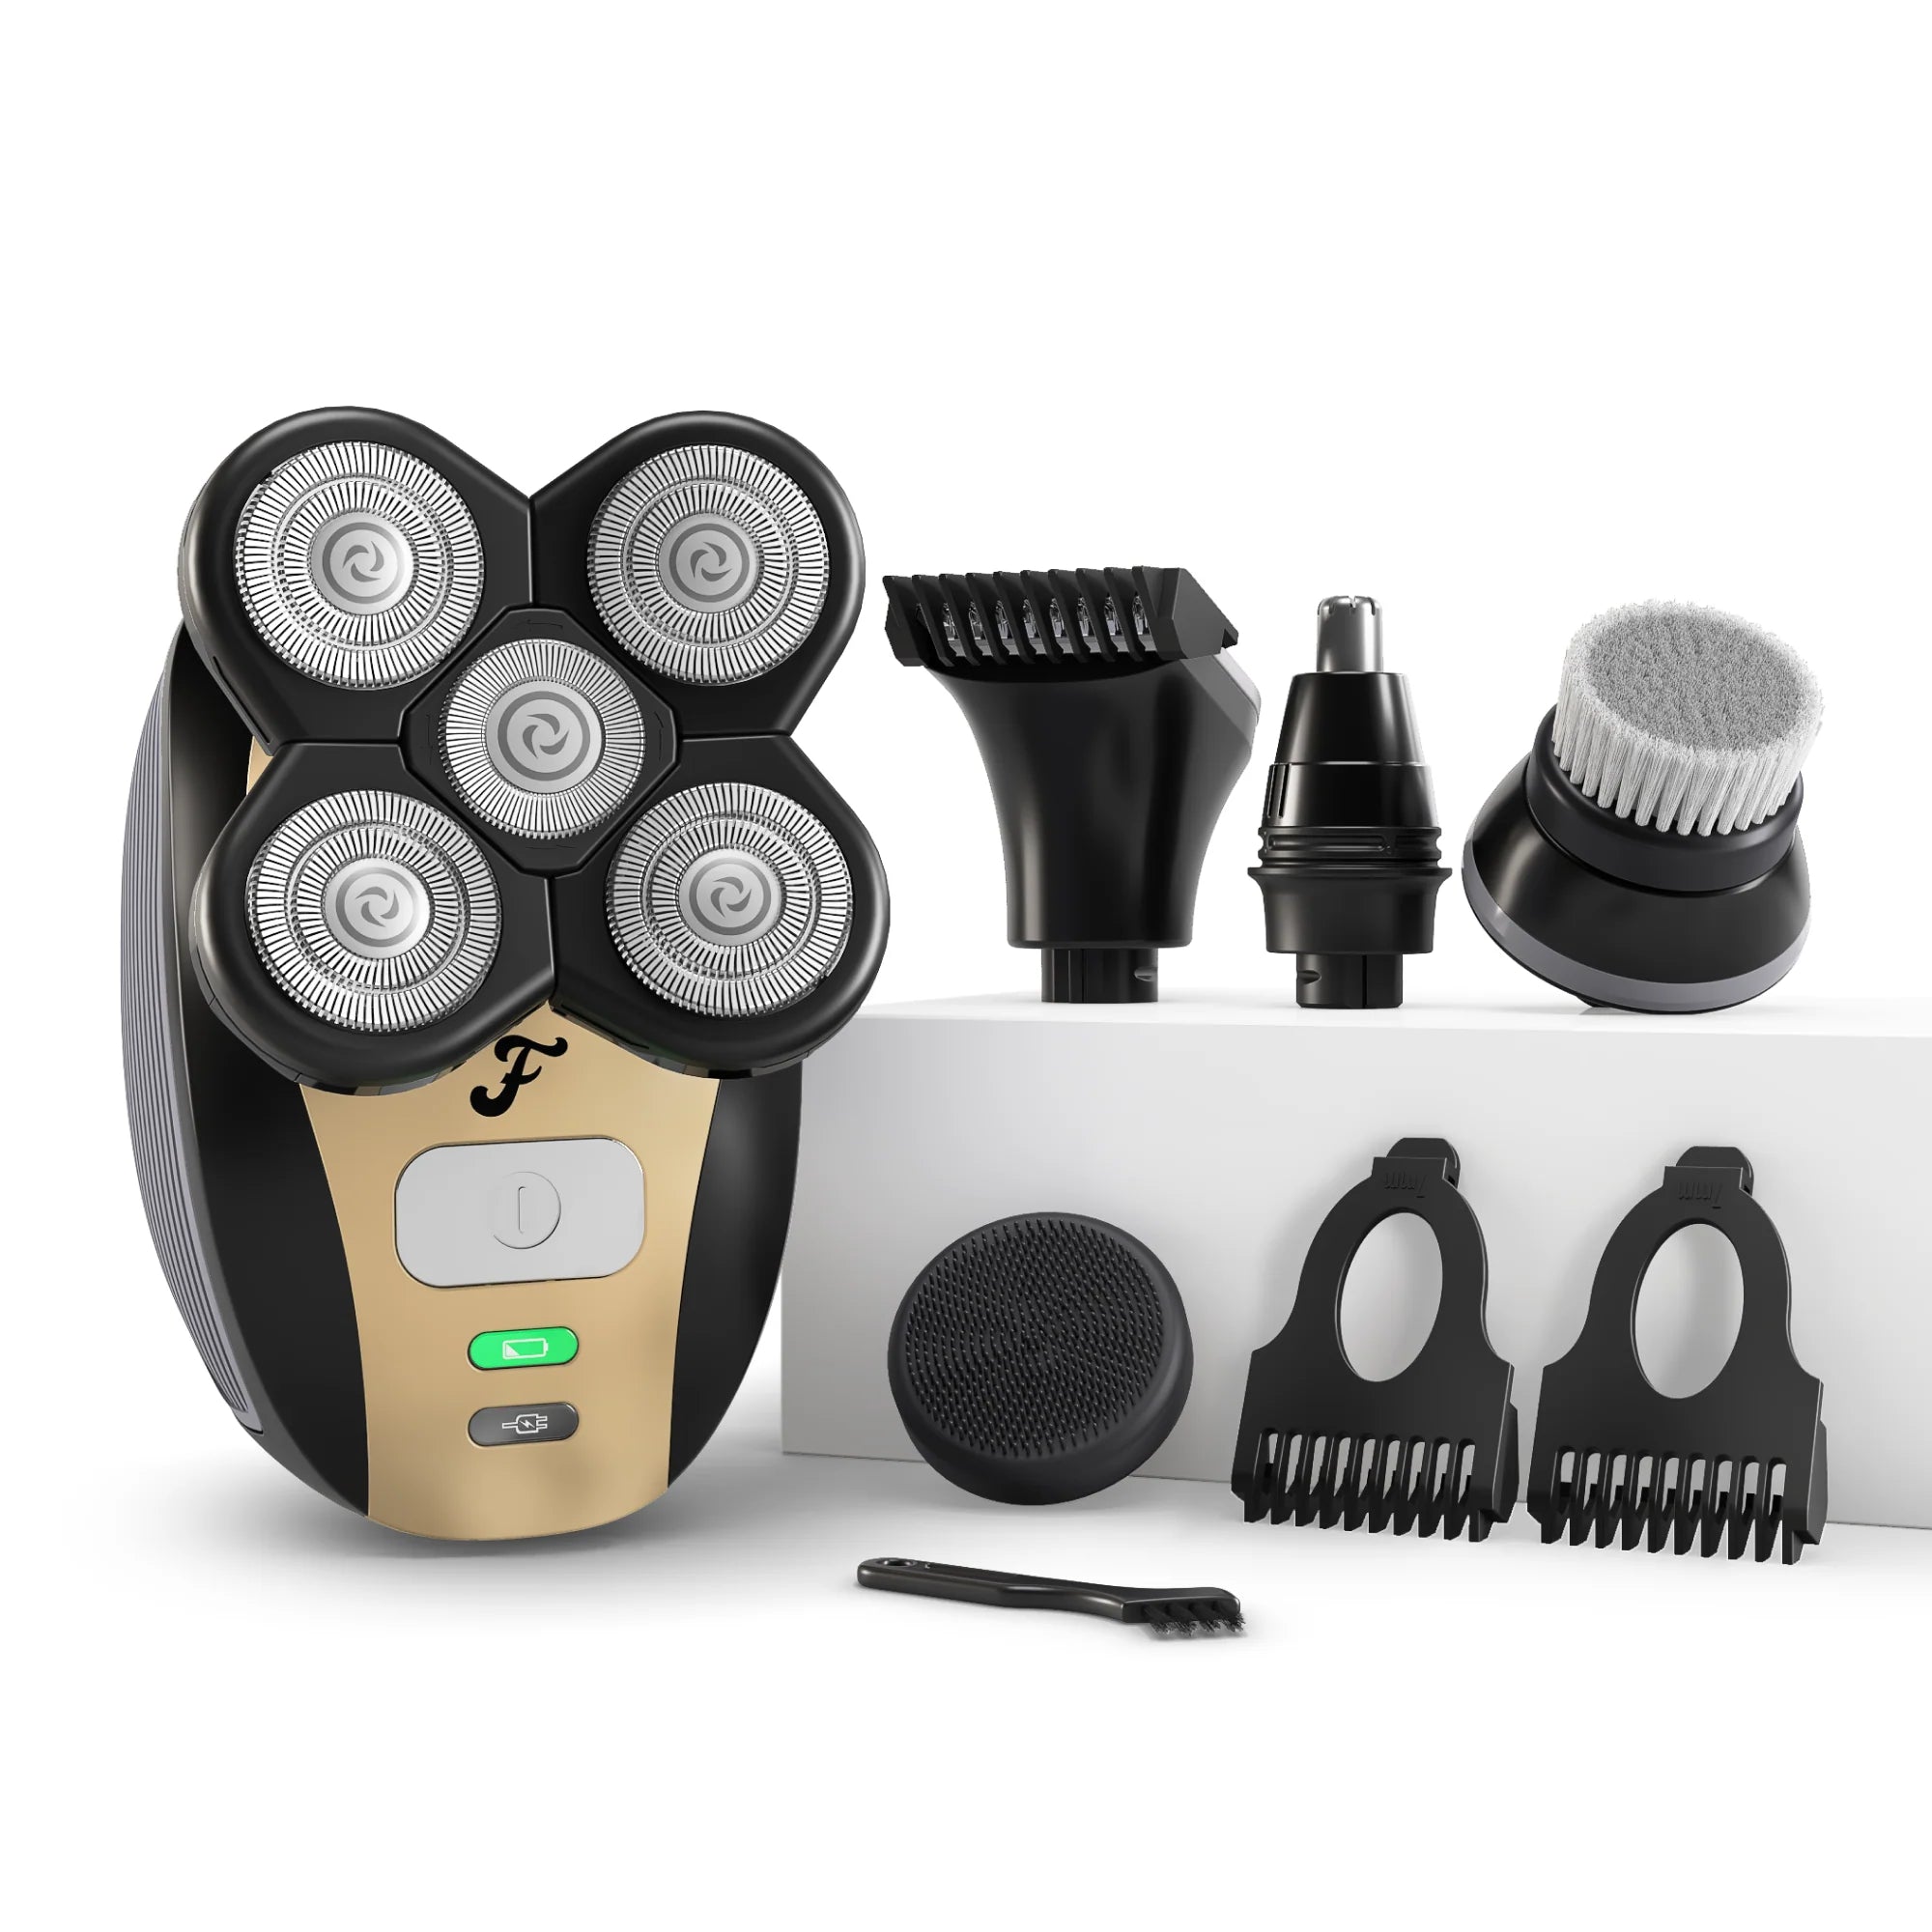
Not all nose and ear trimmers are created equal. A quality trimmer should have rounded blade tips, a sealed cutting head, and enough power to cut through coarse hair without snagging. The Pro Nose & Ear Hair Trimmer excels in these areas, featuring hypoallergenic stainless steel blades and a protective guard that prevents direct skin contact. For those who prefer a more compact option, the standard Nose & Ear Hair Trimmer offers similar safety features in a travel-friendly design.
What to Look for in a Safe Trimmer
- Rounded blade tips: Avoid sharp or pointed blades that can cause micro-cuts.
- Sealed or washable head: Prevents hair and bacteria from accumulating inside the motor.
- Quiet motor: Reduces vibration and noise, making the experience less jarring.
- Ergonomic grip: Ensures steady control, especially in hard-to-see areas like the inner ear.
Step-by-Step Guide to Painless Nose and Ear Trimming
Follow these steps to minimize discomfort and maximize safety.
Step 1: Clean and Dry the Area
Always start with a clean face and ears. Use a gentle cleanser to remove oils and debris, then pat dry with a soft towel. Wet hair clumps together, making it harder for the trimmer to cut cleanly. Dry hair stands upright, allowing the blades to snip each strand evenly. If you have sensitive skin, consider applying a drop of Lubricating Pre Shave Oil around the nostrils to soften the hair and reduce friction.
Step 2: Insert the Trimmer at the Correct Angle
For the nose, tilt your head back slightly and insert the trimmer tip no more than 1 cm into the nostril. Angle the blade outward, away from the septum (the middle cartilage), to avoid irritating the sensitive membrane. Never push the trimmer straight in or rotate it aggressively—let the blades do the work. For the ears, gently pull the earlobe outward to flatten the folds of skin, then glide the trimmer along the inner rim and tragus. The goal is to trim hair that is visible, not to dig deep into the canal.
Step 3: Use Short, Gentle Strokes
Make quick, light passes rather than long, slow drags. This reduces the chance of the blade catching on a single hair and pulling it. If you feel any tugging, stop and clean the blade head—clogged blades are the most common cause of pain. For precision trimming around the ear’s outer edge, consider using the BeardSeries Trimmer Blade Refill with a fine-tooth comb attachment for extra control.
Step 4: Rinse and Inspect
After each nostril or ear, rinse the trimmer head under warm water (if water-resistant) or use a Micro Cleaning Brush to remove clippings. Inspect your work in a well-lit mirror. It’s better to under-trim and come back than to over-trim and risk irritation.
Common Mistakes That Cause Pain and How to Avoid Them
Even with a high-quality trimmer, certain habits can lead to discomfort:
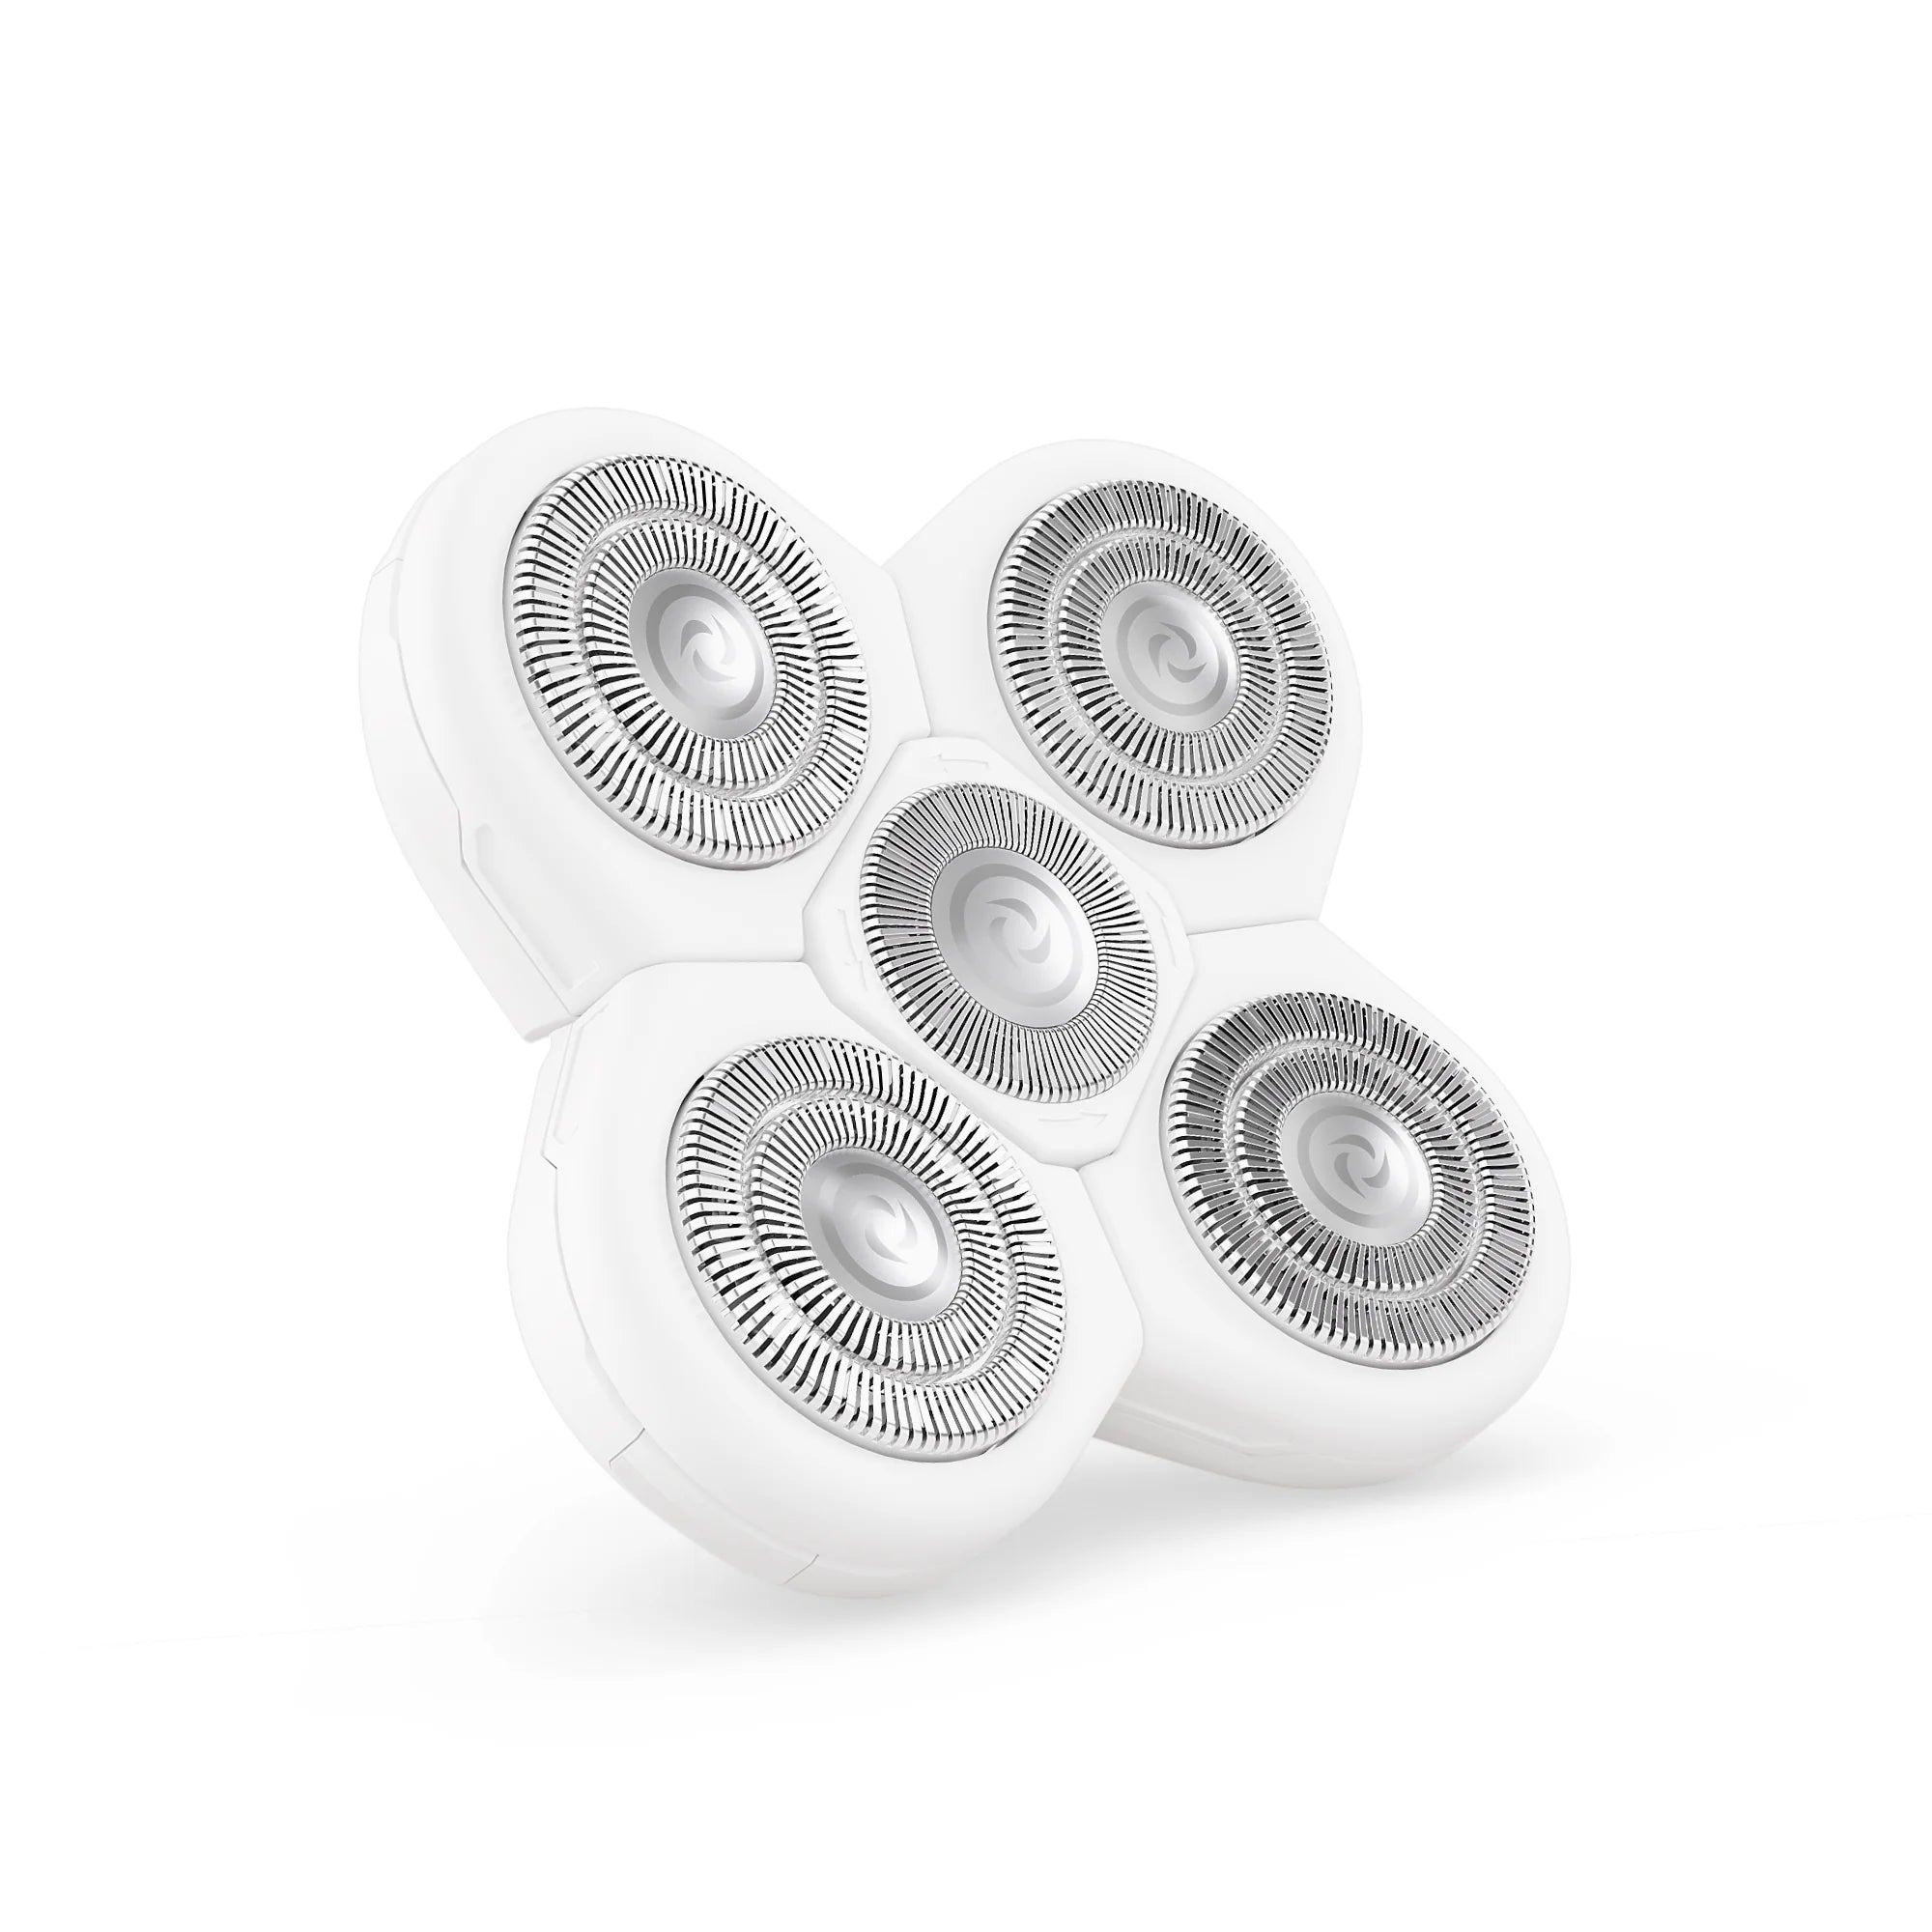
- Using dull blades: Replace your trimmer head or blade refill every 3–6 months. Dull blades crush hair rather than cut it, causing pulling.
- Trimming too deep: Never insert the trimmer further than the width of your fingertip. The hair inside your nostril is there to protect you; removing too much can lead to infections.
- Rushing the process: Take your time, especially if you’re new to grooming. Rushing increases the likelihood of jerky movements and accidental nicks.
- Skipping maintenance: A dirty trimmer harbors bacteria that can cause folliculitis (infected hair follicles). Clean your trimmer after every use.
Aftercare: Soothe and Protect Your Skin
Once you’ve finished trimming, rinse the area with cool water to close the pores. If you notice any redness or sensitivity, apply a fragrance-free moisturizer or a tiny amount of aloe vera gel. Avoid blowing your nose vigorously for an hour after trimming to prevent irritation. For an extra layer of comfort, you can also use a small dab of Lubricating Pre Shave Oil as a post-trim soothing agent—it’s gentle enough for sensitive areas.
Maintaining Your Trimmer for Long-Lasting Performance
Proper maintenance ensures your trimmer stays sharp, hygienic, and pain-free to use. After each session, remove the blade head and rinse it under running water. Use the included Micro Cleaning Brush to dislodge any stubborn hairs from the blade assembly. Dry the head thoroughly before storing to prevent rust. For models like the Pro Nose & Ear Hair Trimmer, which is fully washable, a quick rinse is all it takes. Lubricate the blades once a month with a drop of light machine oil to keep them gliding smoothly.
When to Replace Your Trimmer or Blades
If you notice that the trimmer is pulling more hair than usual, or if the blades no longer seem sharp after cleaning, it’s time for a replacement. The BeardSeries Trimmer Blade Refill is compatible with many Myfreebird trimmers and offers a quick, cost-effective way to restore performance. For full systems, consider upgrading to a kit that includes a travel case for on-the-go maintenance, such as the Travel Case.
Frequently Asked Questions About Painless Nose and Ear Trimming
Does trimming nose hair hurt if done correctly?
No. With a quality trimmer featuring rounded blades and proper technique, you should feel only a light tickle. Pain usually indicates a dull blade, dirty head, or incorrect insertion angle.
Can I use a beard trimmer for nose and ear hair?
It’s not recommended. Beard trimmers have wider, sharper blades designed for coarse facial hair and lack the protective guards needed for sensitive nasal passages. Always use a dedicated nose and ear trimmer.
How often should I trim nose and ear hair?
Every 1–2 weeks, depending on your hair growth rate. Over-trimming can lead to irritation, so only remove hair that is visible outside the nostril or ear rim.
Final Thoughts: Groom with Confidence
Using a nose and ear hair trimmer doesn’t have to be a dreaded chore. By selecting the right tool—like the Pro Nose & Ear Hair Trimmer—and following the safety steps outlined above, you can maintain a clean, well-groomed appearance without any pain or discomfort. Remember to keep your trimmer clean, replace blades as needed, and always prioritize gentle, controlled movements. Your grooming routine should feel like self-care, not a battle.
Ready to upgrade your grooming experience? Explore the Pro Nose & Ear Hair Trimmer today and enjoy a painless, precise trim every time. Your nose and ears will thank you.